What Makes Art ART?

Why is Art Art?

What is the difference between GREAT ART and mediocre art?

I don’t really know. The phrase “I know it when I see it” makes art a perception but art is still art whether it is perceived as such by one or not. So then the idea of art becomes quite subjective depending on the viewer’s opinion or mood of the day.

For me really good art is that which has been drawn well and somewhat realistically but is then turned into an abstract or an impression or an abstract impression. I am a bit of a conservative in that I believe for artists to create really good art they have to be able to draw. I have told my students that drawing is the basis of all other art techniques.

My favorite artists who have demonstrated the ability to draw realistically and turn a painting or sculpture into an abstract, impression or abstract impression are Pablo Picasso and David Hockney. There is a video/DVD called “Behind the Scenes, Volume:1 Painting and Drawing” (available on Dick Blick’s website) during which David Hockney draws a chair from many different views while explaining perspective, depth, and vanishing point. I showed it many times to my middle school students. The result is a cubistic chair (Picasso’s influence).

Today I discovered a painting of David Hockney’s called “Gaugin’s Chair” that looks like the very chair that’s in the DVD. It’s a painting with bright tropical colors similar to those Gaugin used but drawn in a cubistic manner like Picasso. That thought process is what makes a great artist and great art to me!

That’s MY opinion! Mizz Mac
Paper Mache and Cinco de Mayo

Some thoughts and ideas about organizing supplies for papier mache projects

I just love papier mache! As an art teacher though it took me a few years to find ways to organize and make good products with the children doing all of the work. Keep in mind I had 6 art tables with 4 chairs at each table and a double sided easel on each end of the tables. I kept large clips on each easel. Each table was a color and each table had a designated table captain. I did have assigned seats which were moved each month.

First of all there is the glue- A veteran art teacher advised me to use a product called Art Paste. It comes in a dry pouch and mixes in a gallon of water. The glue is a vegetable based product so there shouldn’t be anyone allergic to it and it’s not made from animal’s hooves so it shouldn’t offend any religions. I had large gallon size plastic ice cream containers with lids. I would mix up the glue in each container, one per table, and an extra one for spare.  That was enough glue for one whole grade of 3 classes.  Each gallon container can be placed on the table. Or small bowls like frozen whip containers can be used at each table. Each table captain can refill the bowl as needed.

The tables were covered with either newspaper or vinyl tablecloths.

I would also have either a Styrofoam tray or a paint cup with masking tape for each person’s project to dry on. A helper can put the tape on ahead of time.  Students would write their own names on the masking tape with pencils or crayons.

Now the paper to use- I found it easier on the students to figure out how many layers they used if we used different kinds for each layer. I would begin with newspaper strips for the first layer. Second layer would be colored newsprint strips. The third and last layer would be white newsprint.  I found plastic boxes to use to put the paper strips in. Either I or an intern or any helper can tear  paper strips ahead of time and place in the boxes. It’s a lot of work to do ahead of time but well worth the effort!

On applying the glue to the strips- personally I like to dip the strip into the glue and squeeze the extra glue off with my fingers but some children are too squeamish to do it. Plus it takes a lot of time to wash the glue off the hands. Inexpensive sponge brushes work nicely for applying the glue and can even be thrown away.

Ok well those are my thoughts on setting up supplies for a paper mache project. I hope they were some helpful ideas.  Mizz Mac

Check out my art lesson in my store:

https://www.teacherspayteachers.com/Product/Paper-Mache-Animals-for-Cinco-de-Mayo-661250

Drawing is a good beginning

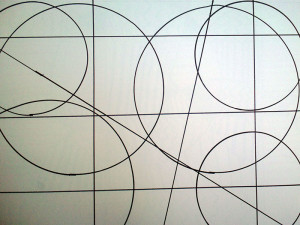
Did you know we only use five lines and two shapes when we draw? That’s all we use! That sounds easy doesn’t it?

What are the five lines and two shapes? The five lines are the horizontal line (straight across), the vertical line ( straight up and down line), the diagonal line ( drawn at an angle from top left to bottom right or top right to bottom left), the curvy line or wavy line, and the zigzag line.  The two shapes are natural ones (like clouds) and geometric ones (squares, rectangles, triangles, circles).

First we need to practice making the lines and shapes. Get some markers or crayons. If you like to use a ruler, go ahead and get one.

You will also need a white piece of paper.

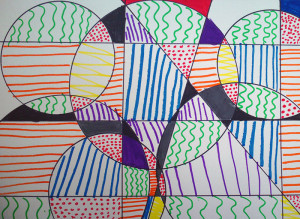
A good practice would be to draw the five lines on your paper. Begin with drawing 3-5 lines of each kind of line on your paper. An example would be to draw 3-5 horizontal lines, 3-5 vertical lines, etc. Then draw 3-5 geometric shapes different sizes on the same paper. The different lines will divide the geometric shapes into natural ones.

Now color in the various shapes. lines,-patterns,-and-shapes-examples-006

lines,-patterns,-and-shapes-examples-007