Some thoughts and ideas about organizing supplies for papier mache projects
I just love papier mache! As an art teacher though it took me a few years to find ways to organize and make good products with the children doing all of the work. Keep in mind I had 6 art tables with 4 chairs at each table and a double sided easel on each end of the tables. I kept large clips on each easel. Each table was a color and each table had a designated table captain. I did have assigned seats which were moved each month.
First of all there is the glue- A veteran art teacher advised me to use a product called Art Paste. It comes in a dry pouch and mixes in a gallon of water. The glue is a vegetable based product so there shouldn’t be anyone allergic to it and it’s not made from animal’s hooves so it shouldn’t offend any religions. I had large gallon size plastic ice cream containers with lids. I would mix up the glue in each container, one per table, and an extra one for spare. That was enough glue for one whole grade of 3 classes. Each gallon container can be placed on the table. Or small bowls like frozen whip containers can be used at each table. Each table captain can refill the bowl as needed.
The tables were covered with either newspaper or vinyl tablecloths.
I would also have either a Styrofoam tray or a paint cup with masking tape for each person’s project to dry on. A helper can put the tape on ahead of time. Students would write their own names on the masking tape with pencils or crayons.
Now the paper to use- I found it easier on the students to figure out how many layers they used if we used different kinds for each layer. I would begin with newspaper strips for the first layer. Second layer would be colored newsprint strips. The third and last layer would be white newsprint. I found plastic boxes to use to put the paper strips in. Either I or an intern or any helper can tear paper strips ahead of time and place in the boxes. It’s a lot of work to do ahead of time but well worth the effort!
On applying the glue to the strips- personally I like to dip the strip into the glue and squeeze the extra glue off with my fingers but some children are too squeamish to do it. Plus it takes a lot of time to wash the glue off the hands. Inexpensive sponge brushes work nicely for applying the glue and can even be thrown away.
Ok well those are my thoughts on setting up supplies for a paper mache project. I hope they were some helpful ideas. Mizz Mac
Check out my art lesson in my store:
https://www.teacherspayteachers.com/Product/Paper-Mache-Animals-for-Cinco-de-Mayo-661250
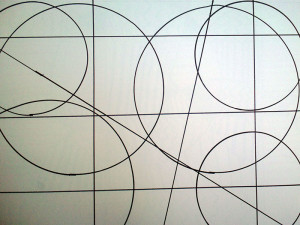
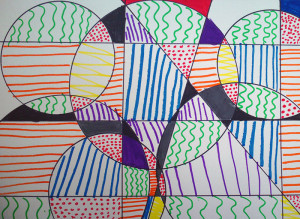
 If you are like me, you are ready for the children to go outside! There are plenty of art activities they can make or draw outside. Plenty of children of all ages like to draw with sidewalk chalk. Children can be inspired by drawing a large circle or square and adding a variety of lines and shapes and colors. Older ones can print out abstract paintings of Picasso with noses going in one direction and eyes in another. Tomato Soup cans of Warhol can be inspirational.
 Are you quarantined with bored children? Maybe they are busy with assignments and need a break. My Spring Coloring Sheets can be just the thing to break up the boredom! You get 10 sheets of Spring flowers to color for $2! Here’s the link: